Simple duct tape projects that stick
Published 12:45 pm Tuesday, February 23, 2021
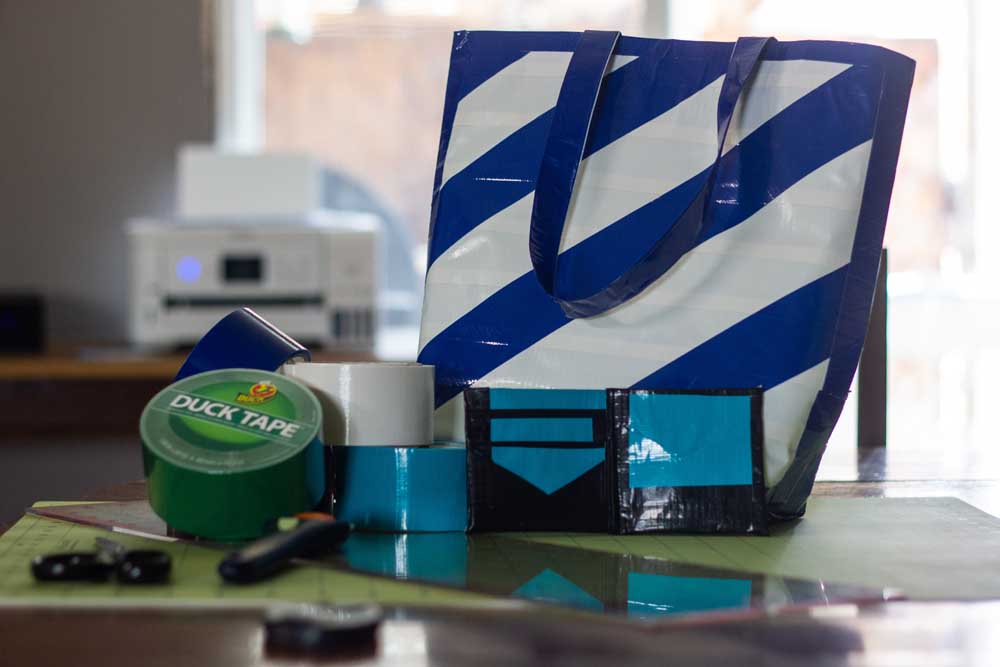
- Duct tape projects and materials.
Turns out you can pretty much make anything out of duct tape. From duct tape hammocks, Christmas ornaments, flip -flops and even prom dresses (for which students can win scholarships), if you want to make something, duct tape has you covered. With more colors and patterns on the market than the classic silver utility style, the creative possibilities are endless.
Starting out making crafts with the ultra-sticky tape can get frustrating, so take your time and don’t get too worked up if something rips or falls apart — you can always tape it.
Trending
It’s recommended that you use a cutting mat, rotary cutter or X-Acto knife and ruler with projects, as the tape doesn’t adhere as firmly to those mats used for sewing and the rotary cutter allows for more precise cutting.
For more craft ideas, duct tape maker Duck Brand has a full page dedicated to craft projects on its website duckbrand.com.
Duct tape wallet
Possibly the project that launched a thousand others, the duct-taped wallet is surprisingly effective and durable. Plus you can customize it to your heart’s content with taped designs and flourishes.
Materials
Duct tape
Trending
Scissors or cutter
Ruler or straight edge
Directions
• Make a duct tape piece of fabric (a rectangle made of duct tape on both sides) 8-by-7 inches and fold in half lengthwise to make it 8-by-3.5 inches.
• Tape both sides together creating a pocket, fold any extra duct tape inside the pocket to reinforce the seam.
• Make four to six 2-by-3.5 pieces of fabric of one color, then make two more of a different color. These will be your card pockets.
• Cut a triangle-shaped notch out of the long side of both of the pieces of a different color and tape them to two of the other fabric pieces along the bottom and side. This should create two small pockets.
• Arrange all 2-by-3.5 pieces on the wallet, to check for spacing. Then tape three together on the backside. This will create the cardholders.
• Tape the two cardholder sets to the inside of the wallet. Use narrow pieces of duct tape to maintain a more uniform look.
• Add embellishments, designs or varied colored edging to complete.
Tip for making a fabric piece: For larger pieces, use a piece of a plastic bag that measures slightly smaller than the piece you’re trying to make. Cover one side in tape with the tape overlapping the plastic, then flip it and cover the other side. This helps prevent unwanted sticking and makes it easier to handle. Smaller pieces can be taped directly together carefully.
Materials
Plastic trash bag
Duct tape
Scissors or cutter
Ruler or straight edge
Directions
• Cut the trash bag open so it is one piece, then measure out the dimensions of the bag you want to make, doubling the height and adding about an inch on all sides. Cut the bag to size and lay it flat.
• Tape strips of duct tape to the bag in whatever pattern you’d like, extending the tape a couple of inches over the sides of the trash bag. Note: the middle of the taped trash bag will be the bottom of your tote.
• Once the entire trash bag has been covered in tape, cut the edges down to size using a straight edge or ruler and scissors or cutter, then fold it in half with the trash bag side in the middle.
• Tape the sides of the bag together and fold over about ½ inch of tape to the inside of the bag.
You can leave the shape of the bag like this or you can create a flat bottom so the tote can sit upright. To do that, look at the side of the bag where the bottom comes to a point.
• Poke the corner of the bag inward about an inch and repeat on the opposite side.
• Tape the bottom of the bag with one strip of tape to keep the points inside the bag, then tape the inside of the bag, covering the points inside and reinforcing the bottom.
• Reinforce the side seams with a strip of tape. This also prevents any sticky side of tape from the outside from being exposed.
• At the top of the bag, create an edge with a piece of tape and fold it over to the inside along the rim of the bag. You may need to use several pieces of tape as trying to keep one long piece of tape even without it folding in on itself is tricky.
• Using the same color of tape, create the straps. To do this, lay out one piece of tape about 20-24 inches long and fold it along the center, creating a skinnier strip. Repeat for the other strap.
• On one side of the bag, tape the strap down to the inside at the top and repeat on the other side.
• Add extra embellishments or reinforcements if desired.
Marketplace


-
eEdition

-

-