DIY: Seed starting trays and pots
Published 12:00 am Tuesday, March 8, 2016
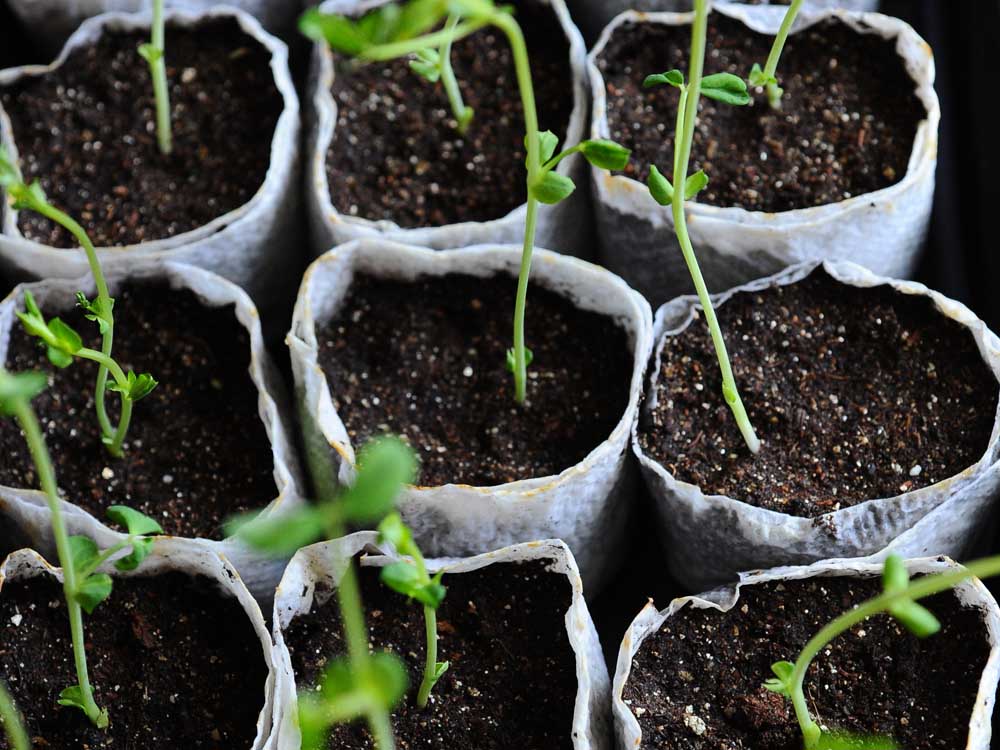
- Ryan Brennecke / The BulletinA collection of homemade seed pots from rolled sections of paper towels.
With spring quickly approaching, it’s finally time to turn dreams of warm-weather gardening into reality. If your plans include growing flowers, plants or vegetables from seed, you’re likely already thinking about the supplies you’ll need to get your seeds sprouting.
While the market is saturated with ready-made trays and seed pots, consider going the DIY route this year, saving both money and time by utilizing things you already have on hand. Start saving household recyclables and supplies now: from newspapers to empty toilet paper rolls; plastic tubs, bottles and yogurt containers to egg cartons and pizza boxes. In just a couple of weeks, you’ll likely have gathered most of the supplies you need to start enough seedlings indoors to be fully prepared when it’s planting time. Although it’s still too early to start many seed varieties, now is the perfect time to get crafty and make as many seed-starting trays and pots as your heart (or garden) desires.
As you collect, create and stash supplies, think about the quantities of each size you’ll need and begin to develop a planting plan that will allow seed varieties enough time to germinate and enough room to root before transplanting outdoors. But before you decide on details, cover the basics: trays and seed-starting pots.
Store-bought plastic seed trays hold a large number of seed pots and, because they don’t have drainage holes, they help retain water as well as protect underlying surfaces. But there’s no need to buy a new one. Any firm plastic storage container — or even a lid from one — can make a sturdy tray.
Cake pans, muffin tins, cookie sheets and other kitchenware offer even more alternatives.
Another option is to make your own waterproof sprouting area so that cardboard trays or plastic trays with holes (such as salad containers or other recyclables) can be used. Again, no need to buy new. Improvise with painter’s plastic or trim down an old shower curtain for a waterproof surface. Even foil or plastic wrap can get the job done temporarily.
Cardboard trays can be made from any box, large or small. From sturdy packing or pizza boxes to thinner cereal boxes, it only takes a few snips with scissors or a swipe with a razor to cut off the excess and create the right size and height. For thinner boxes, such as a cereal box, tape it shut first, then turn it on its side. Cut a hole or square into the top (the side of the box, facing up), leaving a little around the edges for stability.
Raid the recycling bin
Seed pots can be made from nearly anything in your recycle bin. Plastic is preferable to paper or cardboard for durability, but unlike the biodegradable options, plastic pots must be removed before planting, which can disrupt delicate roots or damage tender stems. Be sure to poke or drill drainage holes in plastics.
Toilet paper rolls or paper towel rolls are one of the stronger biodegradable options; simply cut to size, cut four shallow slits into one end, then fold the ends in as if you were closing a box. Set onto any surface (folded side down) then fill with soil.
Although not as sturdy, seed pots can be made out of newspaper, toilet paper or paper towels; for the latter two, be sure to double up the thickness. The same basic steps apply no matter what type of paper you use: First, wrap a strip of your chosen paper tightly around a cylinder, leave a bit at the bottom to fold in to create the base, apply pressure to help the bottom hold, then fill with soil. A solid wooden pot press designed for this purpose makes this quick and easy ($19.95, gardeners.com), but household items such as a small jar or a juice can work, too.
Putting PVC pipe to use
Using PVC pipe as the cylinder makes it a snap; its hollow center allows you to form the pot and fill with dirt in one swoop. Start with a short length of PVC pipe (4-inch to 5-inch), roll a strip of paper around it to overlap and leave about 3⁄4 inches of paper at the bottom to twist together to form the base, setting it down on the twisted end. Find a screwdriver handle or other tool that fits inside the pipe to press and tamp down the twisted paper at the bottom. Add soil right into the middle of the pipe, then tamp with compress slightly. While pressing the pot down still with the tamping tool, simply slip the PVC pipe off the top. Carefully place into your tray, supporting the bottom.
Tips for paper pots
Pots made of paper — especially toilet paper — will be delicate, but they’ll maintain their shape if packed tightly into a tray. They’ll be too weak to be moved individually until it’s planting time, but by then they will have strong roots, making them easier to handle. On the plus side, having 100 little seed pots — even if delicate — packed into a pizza box tray costs close to nothing and gives you a lot of planting potential in a very small space.
Just like papier-mache, but without the glue, using paper pulp to make seed pots helps create seed pots by the numbers in a uniform shape. Any paper, newspaper or paper bags (print must be nontoxic, of course) may be used. Simply tear or cut the paper into small strips, place in blender, pack down, then add water — just enough to get the contents to stir as you pulse the blender on and off. Stop to push down any pieces that are stuck to the sides and add more water if necessary.
When blended into a thick, smooth pulp, dump contents into a strainer and press to squeeze as much water out as possible. Using muffin tins or another stiff mold, place a spoonful or two of the paper pulp into the bottom and begin spreading and pressing with your fingers until the sides and bottom are covered, adding more if necessary. Use a paper towel to press and absorb extra water out of each cup. Allow to air dry or oven dry at 200 degrees, keeping the oven door cracked to let moisture escape. Patch any holes with more pulp.
Putting together a plan
It takes a bit of strategy to execute a successful seed-starting plan. Making your own trays and seed pots is a great way to get the process started. Beyond that, it’s all about timing. Starting seeds too early means roots run out of room to grow and plants get leggy reaching for light. Starting too late can lead to loss if seedlings aren’t strong enough to handle temperature swings or have weak and shallow roots that dry out quickly.
The information on the seed packet will help you determine the approximate timelines for planting, germinating and eventually transplanting outdoors. Marking these dates on a calendar with pencil — and adjusting when necessary — is just one way to create a planting plan.
After more than a decade of my own trials and errors, I still get excited for the challenge a new season of seed starting brings. I’ve come to keep score, but only against myself, allowing my strategies to evolve as both a science of specifics and a guessing game.
— Reporter: laurakessinger@gmail.com


Best of the Best of Bend 2025

-
eEdition

-

-