How to make a kokedama plant, a cherry pit heating pad and more
Published 12:00 am Tuesday, March 8, 2016
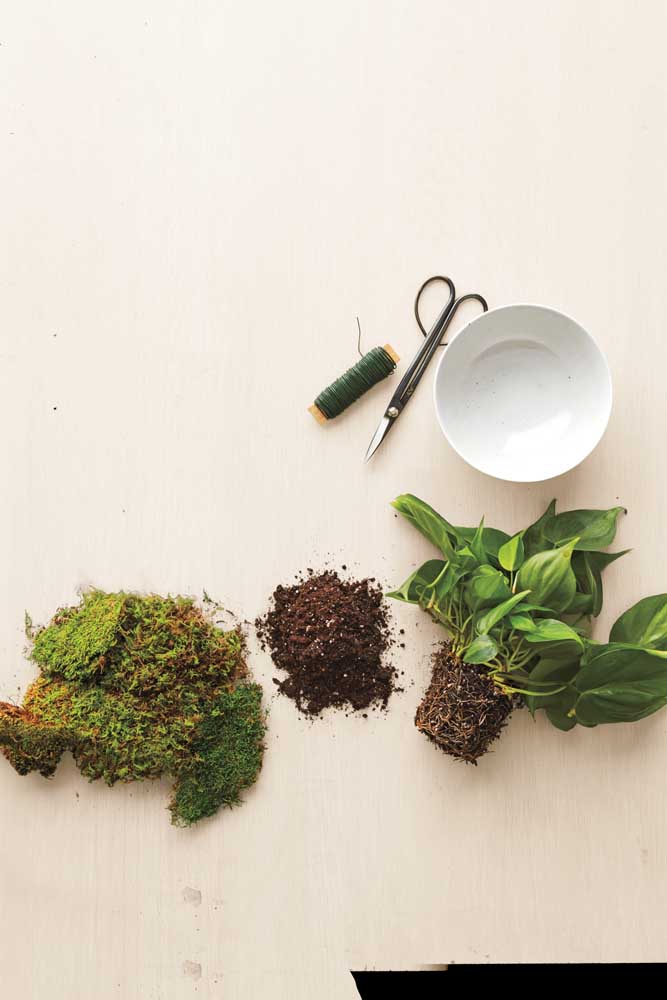
- Photos by Bryan Gardner / Martha Stewart LivingThe finished kokedama is ultra-adaptable and can grow in low light.
Q: I love the look of kokedama. How can I try it at home?
— Faraz Akram, Queens, New York
A: Kokedama is a Japanese gardening technique that’s perfect for a variety of houseplants. It involves wrapping a plant in moss instead of placing it in a pot. The effect? An almost other-worldly elegance. Follow a few easy steps to make your own. Watering your plant is simple: Just dunk the moss and root ball in water until they feel heavy.
Supplies
• Floral wire, 26 gauge
• Gardening scissors
• Bowl
• Sheet moss
• Potting soil
• Plant, such as a philodendron, mother fern or Dracaena reflexa “Variegata”
Kokedama how-to
1. Prepare wires: Cut a 20-inch length of wire. Unravel 20 more inches from spool, leaving wire attached. Twist loose piece around center of attached piece to form an X; lay across bowl.
2. Line bowl with moss: Place a large piece of moss over wires and press down into bowl to make room for plant. Add a handful of soil.
3. Wrap plant: Set plant in bowl’s center. Tie ends of cut wire at top of root ball. Lift plant and moss out of bowl. Continue winding spooled wire around moss until secure. Cut wire; tuck into moss. Display by hanging with wire or placing in a dish.
Q: I like to use heating pads but don’t like all the synthetics. Are there natural alternatives?
— Kimberly Williamson, Chicago
A: You can make your own therapeutic pad with cleaned and dried cherry pits, which absorb heat. First, stitch together two pieces of all-natural fabric, leaving a 2-inch opening. Turn the fabric right-side out. Add pits until it’s two-thirds full (a 9-by-6-inch pad should hold about 1 pound of pits), then slip-stitch the pad shut. Before using, microwave the pad until hot, 1 to 2 minutes (do not overheat — it can be flammable). The pad also works well as a cold pack: Simply cover it with a resealable plastic bag and chill it in the freezer. To make a pretty slipcover, go to marthastewart.com/cherry-pit-cover.
Source: Dried cherry pits, $10 for 4 pounds, cherrypitstore.com.
Q: How do I clean my leather gloves?
— Dani Kemper, Kansas City, Kansas
A: A pair with oily stains should be taken to a dry cleaner, but regular cleaning can be done at home. Bruce Gershon of Arrow Fabricare Services, in Kansas City, Missouri, explains the best method.
1. Wipe away surface stains with a damp soft cloth. (There’s no need to use any soaps or detergents, which can leave a residue.)
2. Air-dry the gloves away from direct heat or sun. Avoid the temptation of using a hair dryer; the heat will cause shrinkage.
3. Loosen the gloves by putting them on and moving your fingers. They should feel less stiff right away.
Q: I’ve noticed a big range of percentages on chocolate labels. What should I use for baking?
— Nikki Mabrey, Warrensburg, Missouri
A: A high percentage indicates more cacao and less sugar. The amounts can dramatically affect not only the taste but also the texture of what you’re baking. When a recipe calls for semi- or bittersweet chocolate, choose those in the 56 to 65 percent range. Use bars with higher concentrations of chocolate only in recipes that specify them — or enjoy that chocolate on its own.
Tip: Store chocolate well-wrapped in a cool, dark place.
Q: I use my pressure cooker to make beans, but what else can I cook in it?
— Veronica Moodie, Fort Lauderdale, Florida
A: Pressure cookers get typically slow-cooking food on the table fast — so they’re great for beans, but can also be used for so much more.
Try making braised meats, rich broths, chilis and soups. They’ll be done in a fraction of the usual time, making them energy-efficient and healthful choices for weeknight meals.
Tip: Do not fill your cooker more than two-thirds full; it needs the empty space to build pressure.
Q: What is the purpose of the low setting on glue guns?
— Nindy Metrizki, Los Angeles
A: The lower temperature setting — upward of 100 degrees cooler than the standard 380-degree setting — will work for most projects, but it’s especially useful with heat-sensitive materials, like cardboard, straw, pinecones and fabric. The lower temperature also reduces the risk of severe skin burns that can be caused by the higher setting.
Make sure to use glue sticks specifically labeled as “low-temperature” or “all-temperature” when using your glue gun on low; they typically have a faster set time.


Best of the Best of Bend 2025

-
-
-