Freezer is your friend
Published 12:00 am Tuesday, June 17, 2014
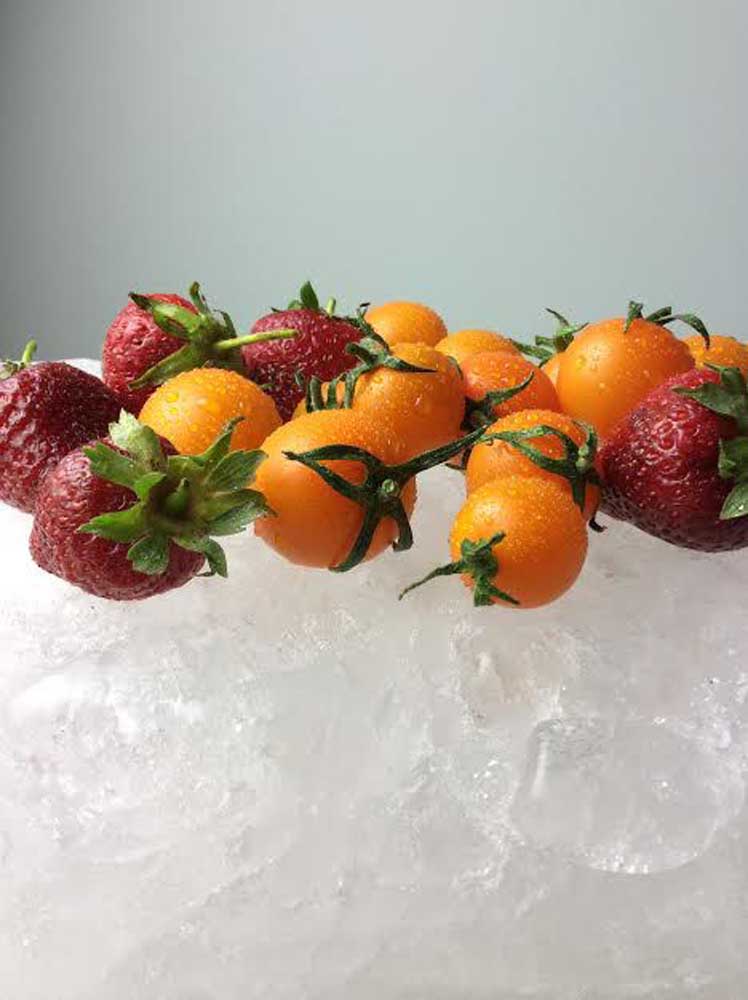
- Jan Roberts-Dominguez / For The BulletinQuality is important for freezing. Start with fresh, great produce for best results and freeze it quickly so the ice crystals are smaller. With something like tomatoes, your best bet is to roast them or puree them first.
Eons and eons before there were canning kettles and jars, there was ice. Very large ice, which came in the form of glaciers. Folks figured out that placing their freshly caught game in the vicinity of the stuff helped prolong the quality of their precious cache.
And thus, a valuable food preservation technique was born.
Now, freezing is not the most glamorous aspect of preserving. You don’t end up with a sparkling row of fancy preserves in your pantry to impress family and friends.
But freezing does get the job done in a fairly tidy and effortless manner. When you’ve got extra produce and no time to turn it into jam or pie, for instance, pop it into the freezer until life has slowed down a bit.
If you really want to take advantage of that big ol’ cold zone this season, you may want to latch on to a book which has at least a chapter on the subject. You can also download some great information online from Oregon State University ( http://extension.oregonstate.edu/catalog. Type in “PNW 214” in the “search” window to view the publication titled “Freezing Fruits and Vegetables.” You can view it for free.)
In the meantime, here are a few of the basics to consider:
• Getting great results means starting with great quality. You’ve got to understand, freezing maintains quality (to a point), but it can’t improve it. So start with really great and fresh food. Next, prepare it under sanitary conditions and store it at zero degrees Fahrenheit or below.
• Fast freezing is best. Visualize the freezing process: As food freezes, the water inside it forms ice crystals. The faster the freezing occurs, the smaller the ice crystals. Slower freezing allows large crystals to form, which tend to puncture cell walls. When that occurs, more of the food’s natural juices will run out of the food during thawing, which undermines overall quality. A little texture change is to be expected, but you can control the destruction to a certain degree. To ensure quick freezing, turn the freezer to its coldest setting the day before freezing a significant amount of food; then place foods in a single layer in the coldest part of the freezer until frozen. Once your batch of food is frozen, you can return the freezer setting to zero degrees.
• The higher the water content of the food, the lower the quality after thawing. It’s a fact of life that changes in texture after thawing are most noticeable in fruits and vegetables with a high water content; meaning all that extra water forms more ice crystals, which will puncture more cell walls and cause a general deflation in shape. Tomatoes, for example, will become mushy if frozen in the raw state. If you roast your tomatoes first (with a bit of olive oil and garlic … oh my!) or cook them into tomato sauce, however, you’ll be cooking off a lot of that moisture, so you won’t have quite as watery a product after thawing.
• Get that enzyme activity under control. One visualizes a frozen chunk of food as a fairly inanimate object. But freezing doesn’t completely inactivate those pesky enzymes. Enzymes are what cause fruits and vegetables to go from beautiful and fresh to brown and yucky, and while freezing slows down their efforts, it doesn’t completely stop them. And so, they must be inactivated before the food is pitched into the freezer. In the case of vegetables, inactivation can be achieved by a heat treatment known as blanching. Typically, this means immersing the vegetable in boiling water for a minute or so. But you can also blanch vegetables in steam or the microwave oven.
In fruits, only the light-colored ones (such as apples, pears, peaches and nectarines) need extra attention so that the enzymes don’t wreak havoc on their beautiful color. The addition of an antioxidant agent (such as ascorbic acid) and sugar do the trick. On the other hand, if you don’t mind a little discoloration, you can skip the treatment.
• Of course, another way to deactivate the enzymes in vegetables is to roast them. This truly is my favorite method for freezing batches of vegetables from my garden. It works fantastically for all kinds of veggies, from asparagus and green beans to peppers and (as I already said) tomatoes. Simply toss them into a roasting pan along with a splash of olive oil, some garlic, a little salt and pepper and perhaps some onions and herbs. Roast until golden and richly flavored. Let cool, then pack into freezer bags and freeze.
• Correct packaging is essential. Freezer burn — the brownish or whitish areas that appear dry, tough and grainy — is what you get when foods aren’t properly packaged and evaporation of moisture from the surface occurs. The food is safe to eat, but the appearance isn’t as appealing, and flavor may be affected. To prevent it, seal foods snugly in moisture- and vapor-proof materials that are specifically designed for use in the freezer.
• Don’t forget the head space. Remember, food expands when frozen, so you need to leave an appropriate amount of room for that to occur or your packaging will burst. The exception is when packing unsweetened fruit that’s already frozen in individual pieces. If you’re using a sugar, juice, water or syrup pack, however, leave ½-inch head space for plastic freezer bags or pint containers, 1 inch for quarts. Do not freeze fruits with liquid in standard glass canning jars (they’re more likely to burst, even with adequate head space).
— Jan Roberts-Dominguez is a Corvallis food writer, cookbook author and artist. Contact: janrd@proaxis.com.


Best of the Best of Bend 2025

-
-
-