Store spare TP in style with this caddy
Published 12:00 am Tuesday, September 15, 2015
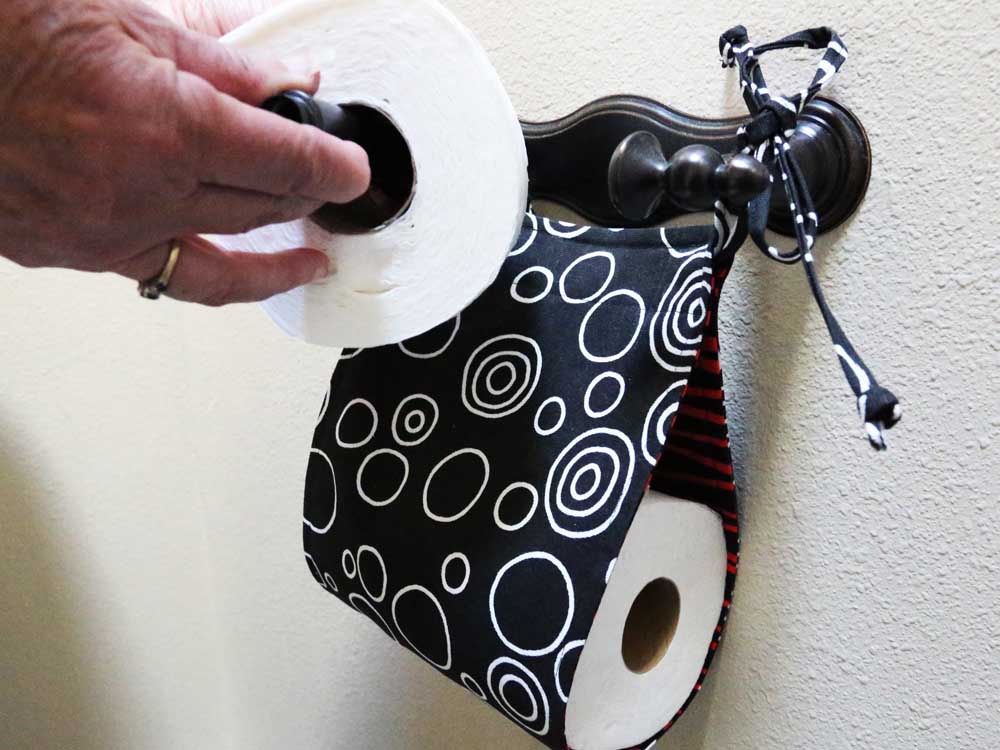
- Andy Tullis / The BulletinThis toilet paper caddy is a solution for a small guest bathroom with limited space.
Storing extra rolls of toilet tissue can be a problem, particularly in a small guest bathroom with limited space. And what if, heaven forbid, the tissue runs out when someone is in need?
A clever tissue caddy is the solution to that dilemma because it holds an easily accessible extra roll in style.
Choose home decor fabrics to coordinate with your bath’s color scheme — one for the outer and a second for the lining. Home decor fabrics have more body than standard cotton fabrics, but lighter weight options can be used if desired — simply add interfacing for more body.
Before you begin the project, measure the width of your wall-mounted tissue holder between the side supports. Most tissue holders are standard size, however, if needed, alter the project rectangle sizes to fit your mounting.
This project is so easy to make, you can change it up seasonally or for special occasions.
What you’ll need:
• 1⁄3 yard outer fabric (cut crosswise, or 3⁄4 yard if the fabric pattern is a one-way design that necessitates cutting lengthwise)
• 1⁄3 yard lining fabric
• 1⁄4 yard fusible interfacing (24 inches wide)
• Basic sewing supplies
Cutting:
1. From the outer fabric, cut one rectangle, 8 by 23 inches and two strips, 1 by 30 inches. Note: The strips can be cut crosswise, even on a one-way print, as they’re very narrow and the patterning won’t show.
2. From the lining fabric, cut one rectangle, 8 by 23 inches.
3. From the fusible interfacing, cut one rectangle, 8 by 23 inches. Fuse the interfacing to the wrong side of same size outer fabric rectangle.
Making the caddy:
Use a 1⁄4 seam allowance, unless otherwise noted.
4. On each tie, fold the long edges to the center and fold one short end in 1⁄4 inch; fold lengthwise a second time to make a tie 1⁄4 inch wide. Press firmly.
5. Edgestitch each folded tie length.
6. With right sides together, stitch the lining rectangle to the outer rectangle, leaving a 3-inch opening along one short side for turning. Trim corner seam allowances diagonally.
7. Turn the caddy right side out through the opening. Press under the seam allowances at the opening and topstitch the rectangle 1⁄8 inch from all edges.
8. Lining sides together, match the short rectangle edges and pin. Fold one tie in half lengthwise and insert the fold between the rectangle layers 1⁄4 inch deep and 1⁄4 inch in from the long edges. Repeat for the second tie. Pin in place.
9. Topstitch the upper caddy edge on the previous stitching line and stitch again 1 inch below the topstitching; follow the previous stitching line on each end to create a stitched box, catching the ties in the stitching.
10. Tie a knot in each end of both ties.
11. Insert a roll of toilet paper in the caddy opening and tie the caddy to the side supports of the holder.
— Reporter: gwizdesigns@aol.com


Best of the Best of Bend 2025

-
-
-