No-carve pumpkin decorating
Published 12:00 am Tuesday, October 28, 2014
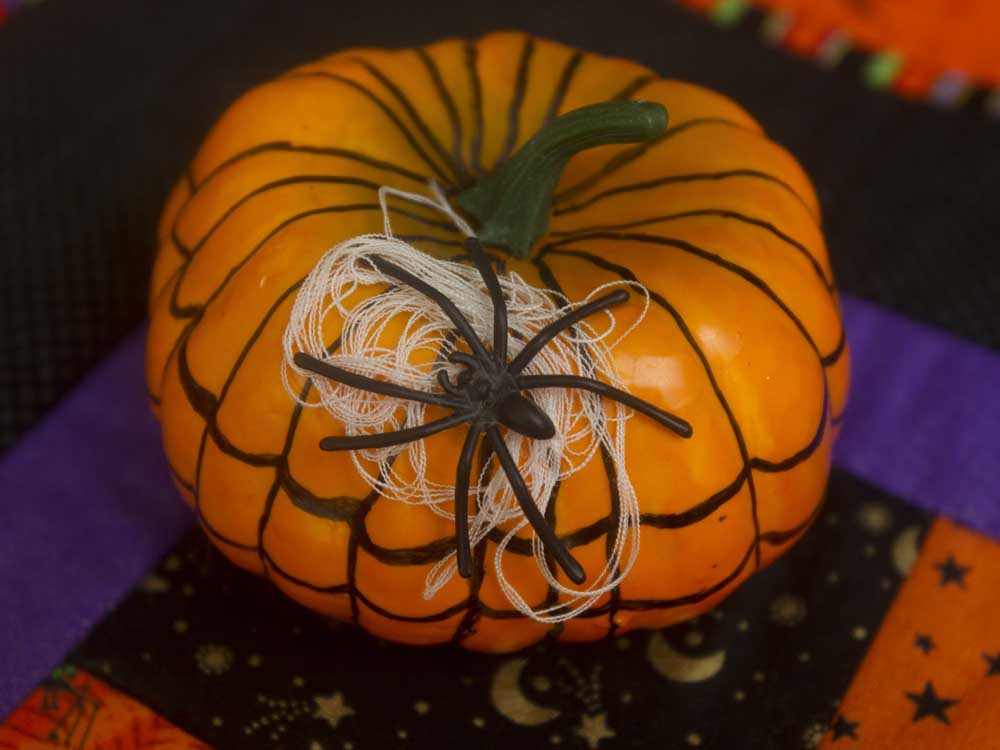
- Andy Tullis / The BulletinUse a permanent marker to create a spiderweb.
If the thought of stabbing a big orange pumpkin and ripping out its guts in the spirit of Halloween is a turnoff, there are other options. Leave the seeds, slime, pulp and other gelatinous membranes in the squash and decorate the outside instead. There’s no moldy, squishy fruit at the end of the holiday season, so put away that paring knife and take a look at other options.
All of these techniques can be used on real pumpkins or on their faux counterparts available at craft and discount stores.
Paint pizazz
Painting the outside of the pumpkin is fast and easy, with either spray or brush-on paint. Choose a color that’s traditional, such as black or white, or go for something mod, such as rainbow tie-dye, by mixing paint colors. Before you begin, just be sure the pumpkin is clean and dry.
Specialty paints work well on pumpkins, and glow-in-the-dark and neons are especially apropos. Glitter paints also add a touch of glam to even the most mundane of the familiar orange orbs.
And how about a mirror-painted pumpkin or one with metallic shine? For best results when using metallic or mirror paints, paint the pumpkin white first, then apply the specialty coat.
If you want to paint only the pumpkin itself, be sure to mask off the stem area for another possible color, or leave it au naturel.
Like the pumpkin orange? Use a rainbow bright and paint only the long attached stem.
Don’t stop at just one coat of paint — consider layers. Create a base coat, then paint polka dots, pin dots, flowers or other motifs on the surface. To easily paint small dots, use the eraser end of a pencil and dip into the paint.
Grab a stencil or two and use it to paint a surface motif. Simply secure the stencil in place on the pumpkin surface with painter’s tape, spray or brush the design area, and remove the stencil. It’s easy to give your jack-o’-lantern a skull tattoo. Or, for a more delicate look, use a paper doily as a stencil for fine detailing.
Rubber stamping designs onto the pumpkin surface works as well, if there are areas large and flat enough for the design area to be firmly pressed.
A permanent marker is ideal for not only drawing on a pumpkin surface, but also writing on it. Begin at the top and write a continuous poem or thoughts going around the shell. Or, draw an eerie spider and its web covering the surface.
Add-ons
Head to the craft store and look for Washi tape in a huge assortment of solid colors and patterns. Pieces of tape can be applied to the pumpkin in a pattern. Small angled bits placed close together create a mosaic look, with only hints of orange or the painted black surface (or another color) between.
Buttons, beads, jewels and trims can be glued onto the pumpkin surface to showcase a design, or simply tie ribbons or trims around the pumpkin, following the vertical rib patterns.
Add some dimension to your jack-o’-lanterns by gluing on tiny spiders, bats or ghosts from the discount store. These can be used in conjunction with other embellishing techniques as well.
Want an allover pattern to intrigue onlookers? Use a decoupaging medium such as Modge Podge and apply decorative tissue paper, newspaper, a patterned paper napkin or fabric to the pumpkin surface. Then coat the pumpkin with either a glossy or matte protective finish once the decoupaging is completely dry.
Looking to add a little color to a pumpkin? Melt wax or crayons and let the liquid color dribble down the upper portion of the pumpkin starting at the stem. Any single color, a mix of colors or even metallics work well.
For a very easy pumpkin transformation, simply glue or pin a small eye mask over the pumpkin skin.
To create a mummy pumpkin, cut cheesecloth into narrow strips and wrap them around the pumpkin, adding some eyes peeking between wraps. Glue the ends in place on the back side.
For some added glitz, spread glue over all or part of a plain or painted pumpkin surface and sprinkle glitter to the desired thickness. For a more frosted look, apply a thin layer of glue, then dip the pumpkin in Epsom salt.
A few straight pins and some yarn can transform a plain-Jane pumpkin into a cute jack-o’-lantern in minutes. Simply outline the shape of the face using the yarn and pin in place, pushing the points clear into the pumpkin.
Letter perfect
If you’re looking to create a fall porch decoration that can last well beyond Halloween, consider embellishing a large pumpkin with your monogram. Either paint the stylized letter onto the pumpkin surface or use cardstock to cut out the shape and glue (or pin) it in place. Add a few ribbons, faux fall flowers and colorful leaves and/or berries to the mix for accents.
It’s a wrap
One of the quickest ways to transform a pumpkin into something spectacular is to encase it in a see-through fabric of some sort. Tulle, nylon netting, lace or patterned hosiery all work well. Tie up the ends at the stem, then embellish the stalk with ribbons, fall flowers or leaves cut from autumn fabrics. Look for fishnet and lace hosiery at a dollar store and simply slide the pumpkin into the leg area and tie off.
Going faux?
If you don’t want to purchase a real pumpkin for your fall decorating, but you do want to carve it (sans the mess), Fun•Kins is an artificial pumpkin option that can be carved and lit just like a real one. The walls are a half-inch thick, and any normal pumpkin carving tools can be used on the material. But, no seeds, pulp or slime inside, and they store easily from year to year.
— Reporter: gwizdesigns@aol.com


Best of the Best of Bend 2025

-
-
-